My list of sewing goals is LONG. I am slowly making it towards a completely handmade wardrobe and am absolutely loving it when people can’t tell I made my clothes. The one area of my wardrobe, though, that is still heavily store bought is woven shorts with a zipper fly, and I so badly want that to change! I have had the Greenstyle Taylor shorts pattern on my to-do list since last summer, and I FINALLY made my first pair a few weeks ago. I was seriously surprised at how easily they came together, and I see these becoming a huge wardrobe staple for me!

After sewing my first pair (a lighter olive colored cotton duck), I immediately wanted to sew a stack of Taylor shorts to go with all of my favorite shirts. However, despite all the fabric I have, I did not have ANY that met the vision I had in my head. I knew I needed solids that go with all my fun tops. I rarely seem to buy appropriate fabric for shorts. All my fabrics that were a good bottom weight for shorts were far too exciting and would not have matched any of the tops in my wardrobe. I auditioned a few of the colorful prints for my daughters, and they told me that everyone would know that I made my shorts if I had deer and polka dots on them. Sigh. Well, I found out that a Hobby Lobby just opened about 5 miles from my house!! So, I gathered the kids in the car, and we made a trip to Hobby Lobby. I found grey twill ($6) and a light blue printed twill ($3) and excitedly started sewing more shorts.

The Pattern
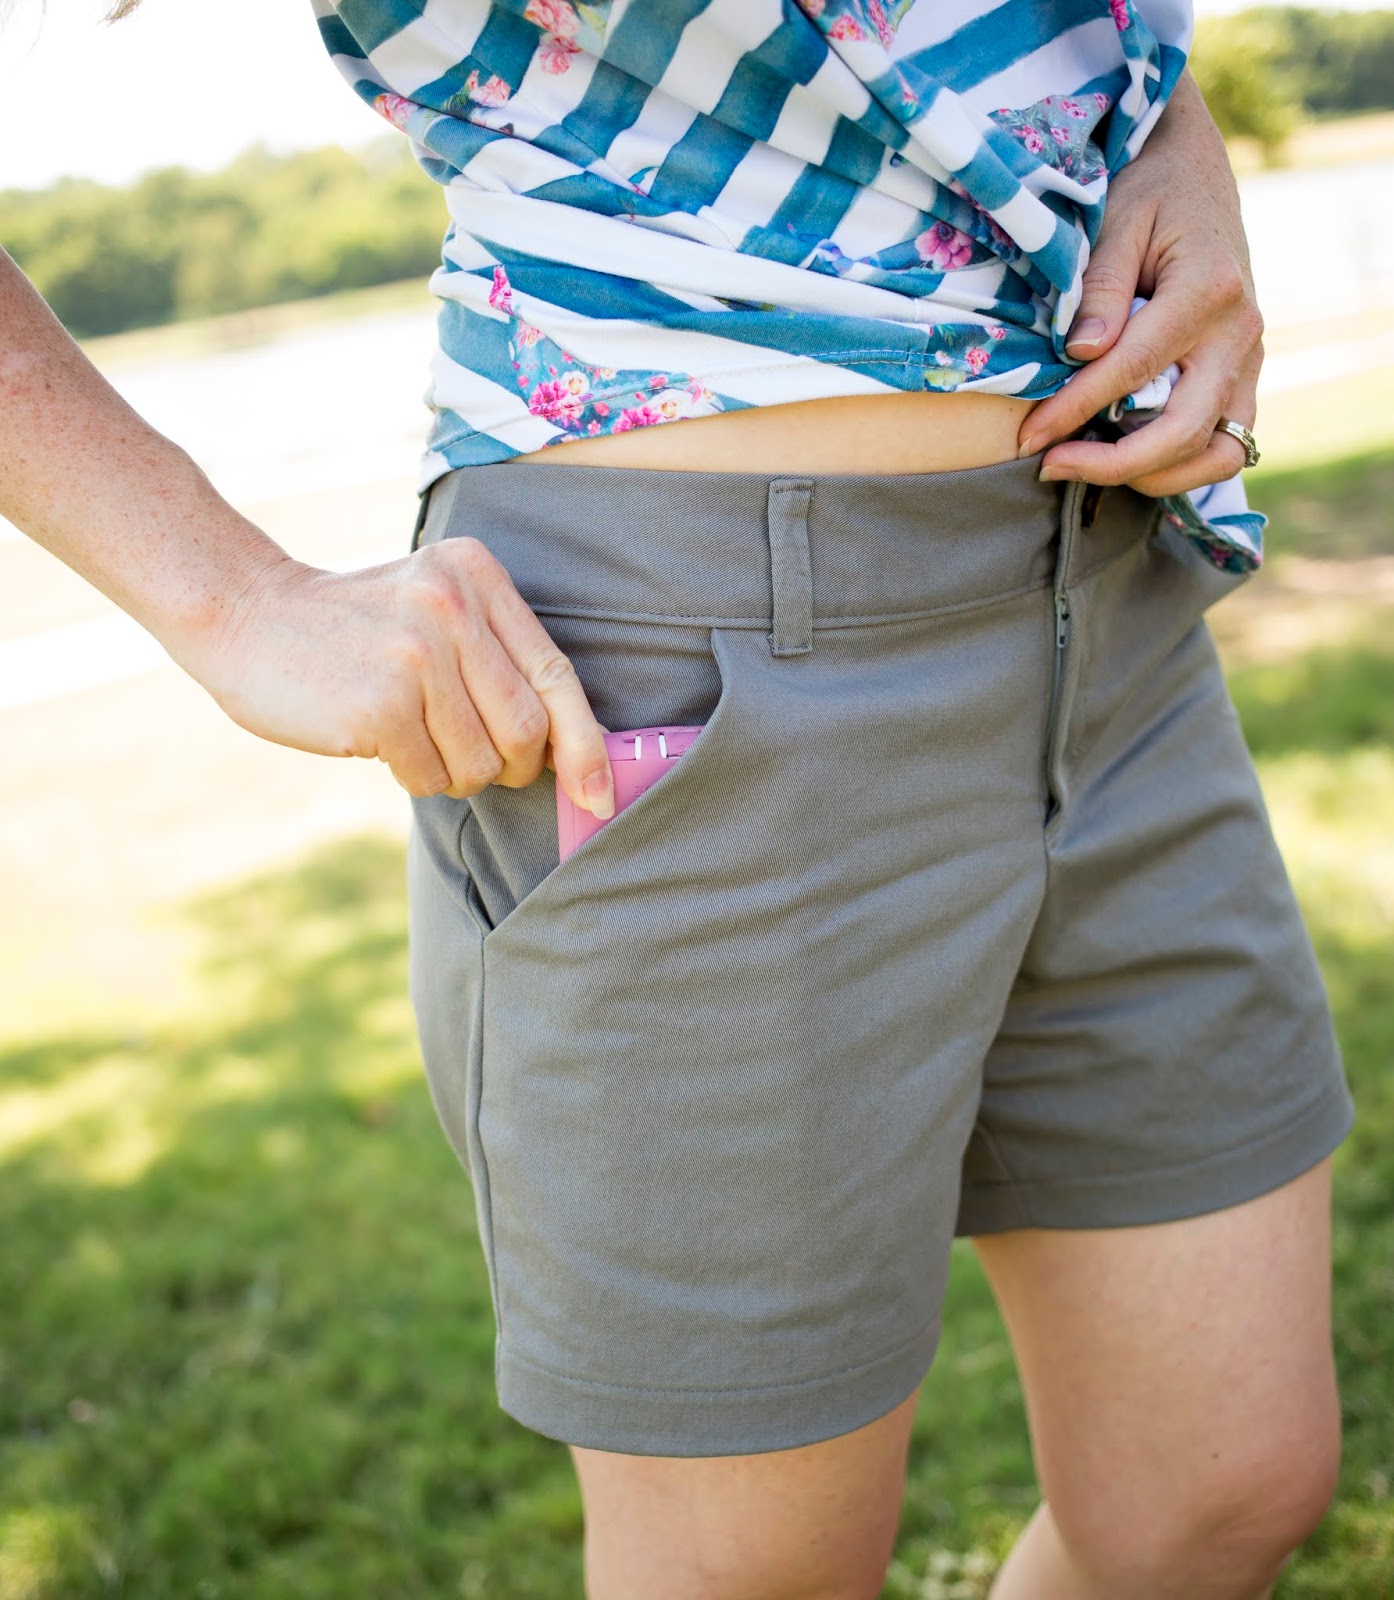
The Taylor shorts pattern comes in sizes 0 to 18, which covers waist sizes 24 to 42 inches and hip sizes 33 to 52 inches. The shorts sit low on my waist and have a fuller leg. The pattern includes a zip fly and a button closure (or a flat hook and eye). There are 3 inseam choices: 2, 5, or 8 inches. I chose 5 inches for all of my shorts. The pockets are deep. Deep enough that my phone fits all the way in without seeing the top stick out. I can bend over and it stays put! This is very unlike all my store bought shorts, where the pocket barely holds keys or my finger tips. Can you see my phone ALL the way in my pocket in the first photo? For size reference, I have an IPhone 6s with an Otter box case to keep it alive.


Sizing and Fit Adjustments
I ultimately made a size 4. My hip measurement is 36 inches, which put me at the top of a size 2. My waist measurement is 26.5, which put me in between a size 2 and 4. I initially made a straight size 2, and they were wearable but not as comfortable and loose as I prefer my shorts and had a lot of drag lines around my hips indicating that I did not have enough fabric to go around. So, I went up to a size 4 and graded the legs back down to a 2. I also increased the back darts and took in the side seams a tiny bit. This meant I had to take a larger seam allowance for the waistband pieces.
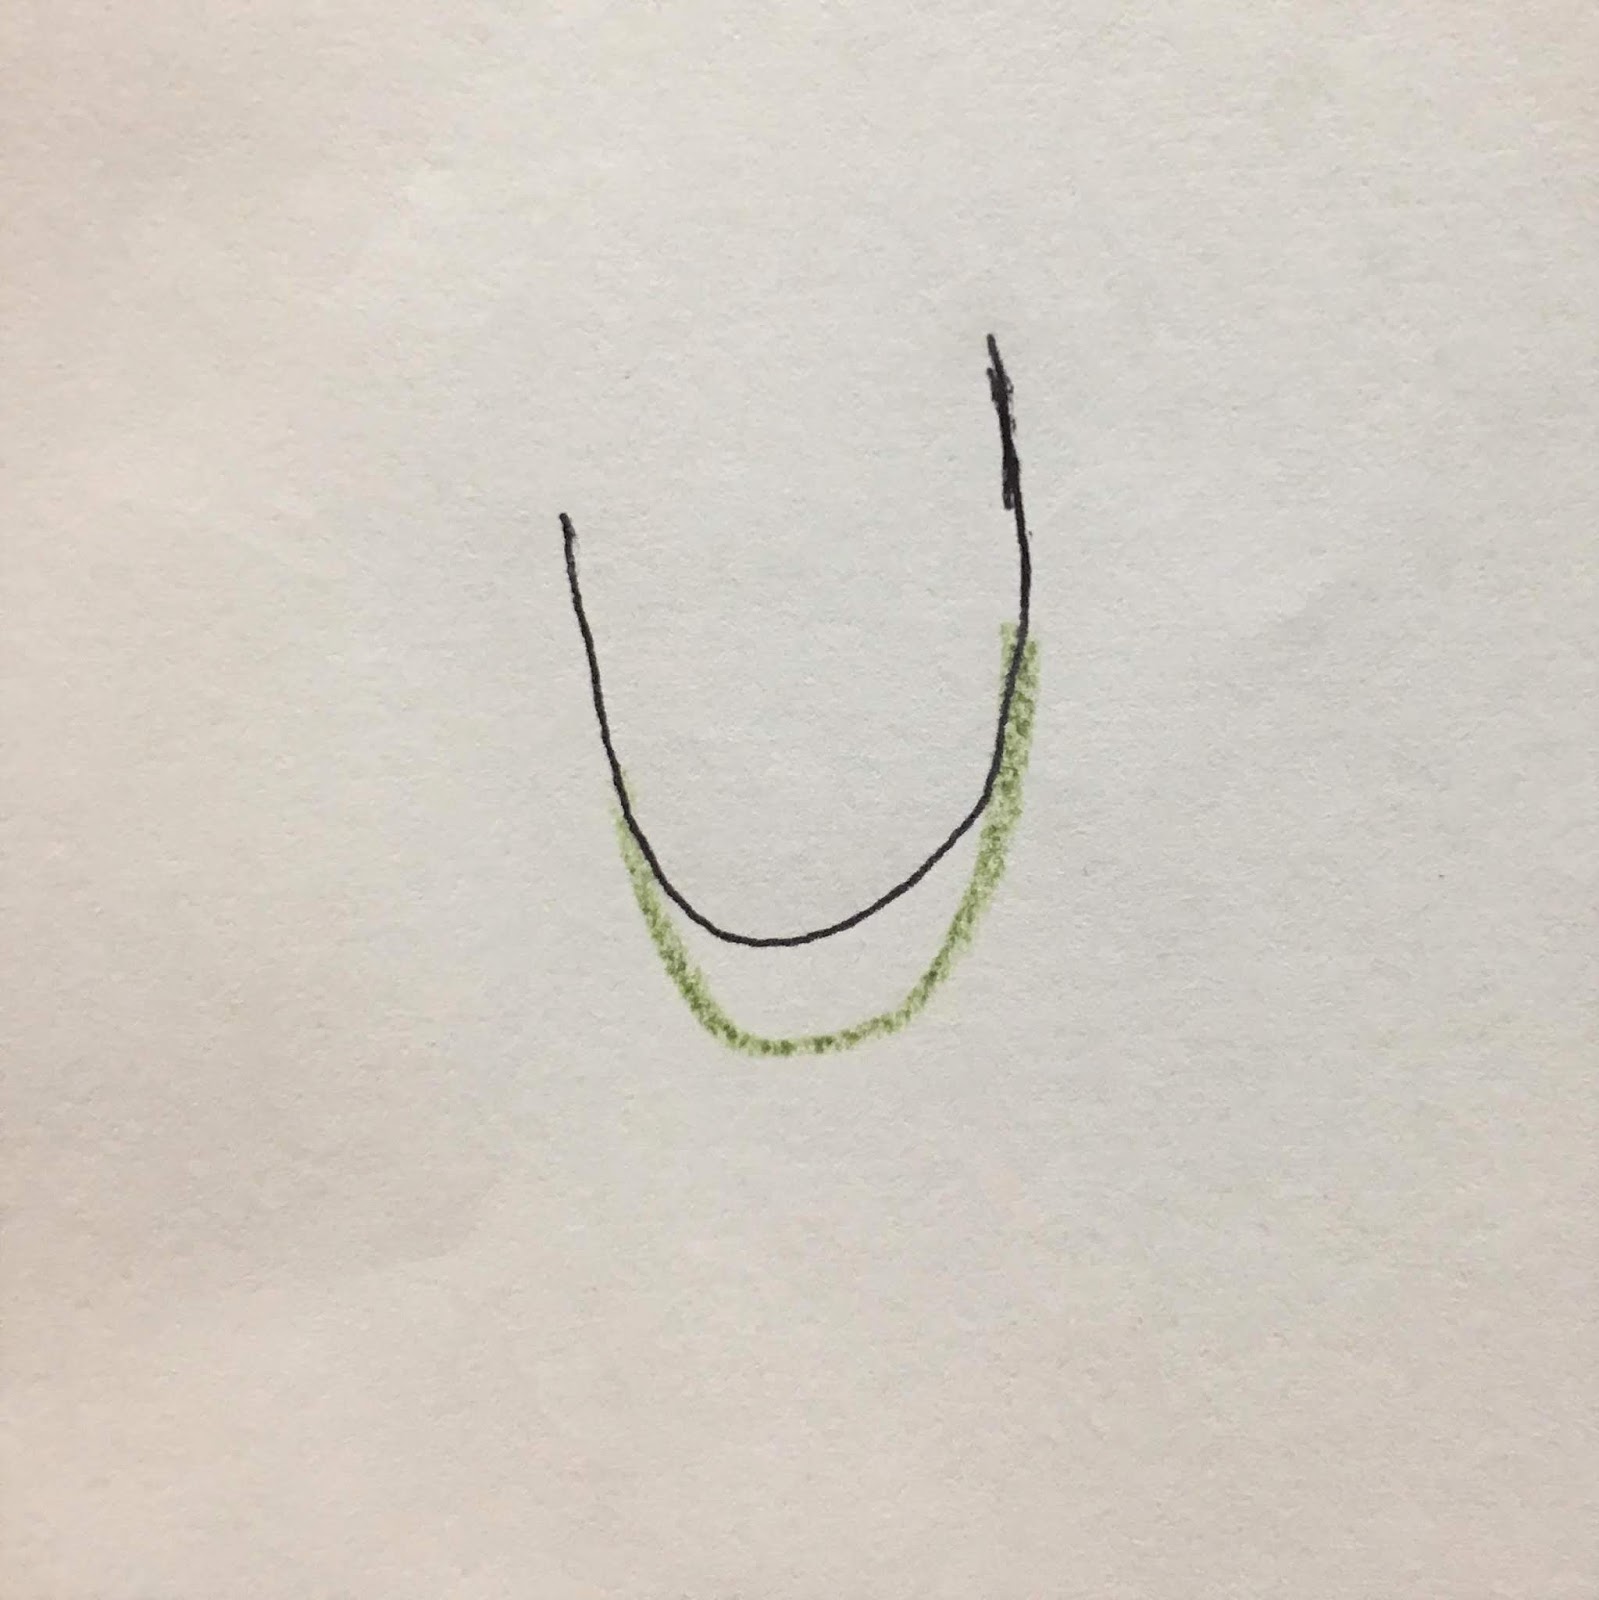
Then, after all was done, I scooped out the crotch some. In my head, this just did not make sense, so I used basting stitches at first before trimming fabric. I am so glad I did this adjustment because it made my seat more comfortable for long sitting sessions of nursing the baby. Here is my rough sketch of what I mean by “scooping the crotch curve.” The black line is the pattern’s crotch. The green line is where I sewed mine and trimmed away the excess fabric. The way the pants are constructed this seam is sewn all at once, which makes this adjustment very easy. I maybe only took an extra 1/4-3/8 inches seam allowance here so don’t let my drawing fool you on how much I took out. It is definitely not to scale.

Belt Loops
The one thing I added to the pattern after my first pair was belt loops!! I really am excited about how these turned out. They are such an easy addition that I feel takes my shorts one step further to making them look more professional. To add belt loops, I cut 5 strips of fabric that were each 2.75 inches long and 1 5/8 inches wide. I sewed the long ends together with a 1/4 inch seam allowance, trimmed the seam a little, pressed the seam open, and turned right side out. Once it was right side out, I pressed the seam so that it was in the middle of the back of the loop. I made 5 markings on my waistband. On the front, I marked two – each 4 inches away from the side seam. On the back, I marked three – one in the middle and two that were 2 inches away from my side seams. Next, I folded the top and bottom of the belt loops under 1/4 inch, pressed, and sewed them down on my 5 markings with a very narrow and short zig zag at the top and bottom. I think my stitch setting was .8 wide and 1 long.

The top I am wearing with my shorts is the Chalk and Notch Pony tank that I made last summer. I still enjoy wearing it all the time. It was great for hiding my tummy in my first trimester when I was pregnant last year.

Next, I want to show you the pair of shorts that I made with the light blue twill that I found at Hobby Lobby for only $3. Great find. These are super comfortable shorts. I made the same adjustments to this pair that I made to my grey pair. These are a little lighter weight than the grey twill but still work great for shorts. They are not as lightweight as a quilting cotton, though. I paired them with another favorite shirt of mine, the Newport top by Itch to Stitch that I blogged about here.


I find that fabric choice will make a big impact on these shorts. You want anything between 7-10 ounces in weight. Also, be careful when making the pockets that you understitch to keep the lining from peeking out. Also, I noticed that on my light blue pair, the pockets like to stick out a little more. This could be because they were cut on the bias, but I think a lot of it has to do with this fabric being lighter weight than the others. If I make these shorts in a lighter weight fabric again, I will reinforce this area with interfacing.


Lastly, I want to show you the green shorts that began my obsession with the Taylor shorts. I actually have two pairs in the green fabric – a size 2 that will fit if I took up endurance running again and a size 4 that fits me with a few cookies. This breezy Chirripo top that I paired them with here does a great job of hiding those extra cookies.

Are you worried about the waistband or zipper construction? Don’t be. There are helpful videos of both here and here.


You can grab a copy of the Greenstyle Taylor Shorts here.
Disclosures


3 Comments
Sharon Aguilar · August 7, 2018 at 4:18 am
Thank you!
Kristi Andres · August 6, 2018 at 7:22 pm
These are great! 🙂
A Quick and Romantic Itch to Stitch Seychelles Woven Top – Sweet Mama · March 24, 2021 at 10:15 pm
[…] so I paired it with shorts. The shorts I am wearing here are the Greenstyle Taylor shorts that I made a few years ago. This shorts fabric is a beast and wrinkles like crazy the second I move though! I think this top […]